VOLTMETER USING ARDUINO (BASICS)
Mar 27, 2020

In this video, I'll show you how to build a voltmeter using an Arduino UNO. The tutorial is divided into two parts:
Part 1: Measuring voltage up to 5V
Part 2: Expanding the range to 30V using a voltage divider
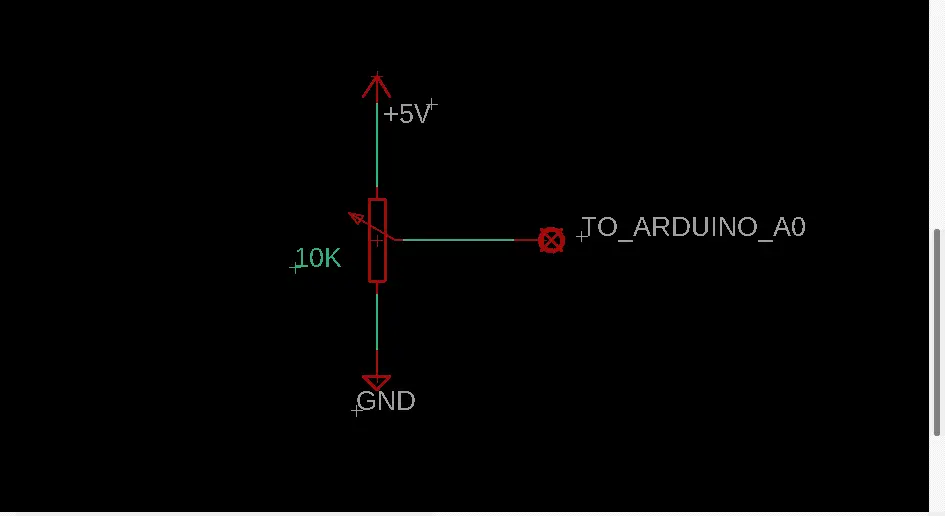
Reading Voltage up to 5V
Components Required
- 1 x Arduino UNO
- 1 x 10KΩ Potentiometer
Setup
- Connect the potentiometer as shown in the diagram.
- Plug in the Arduino UNO to your computer.
- Download and install the Arduino IDE (link in the description).
- Open the IDE, type in a simple code, then compile and upload it.
- Open the Serial Monitor – you'll see values changing from 0 to 1024 as you turn the potentiometer.
Since these are digital values, we need to convert them into voltage readings. By adding a few more lines of code, we can display the actual voltage on the Serial Monitor.
Circuit Diagram

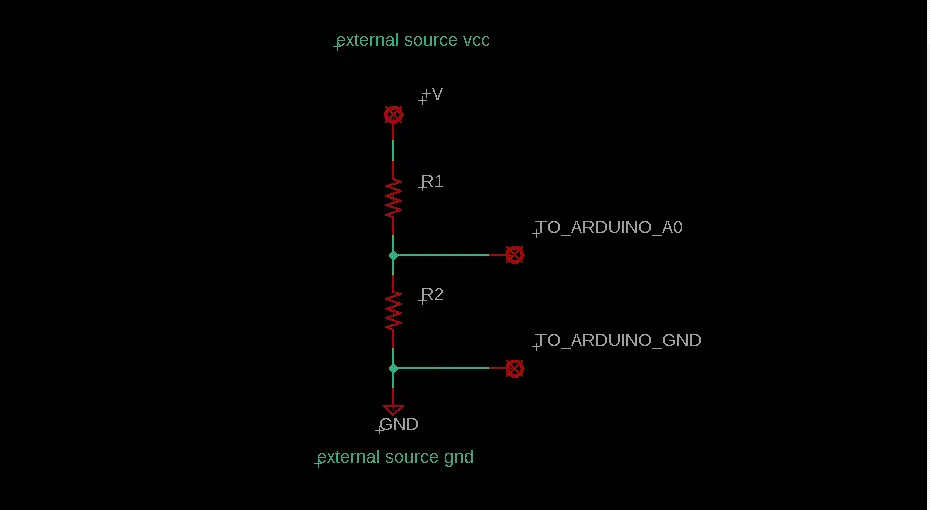
Reading Voltage up to 30V
To measure voltages above 5V, we need a voltage divider—otherwise, applying high voltage directly to the Arduino could damage the microcontroller.
- 1 x Arduino UNO
- 1 x 10KΩ Resistor
- 1 x 1KΩ Resistor
Setup
- Connect both resistors in series as shown in the diagram.
- Take a connection from the middle of the divider to Analog Pin A0 of the Arduino.
- Important: Connect the ground of the voltage divider to the ground of the Arduino.
Now, upload the final code and test the circuit. To verify its accuracy, I’ll use a 9V battery as an example.
Circuit Diagram

Code for this can be found by clicking here
If you like this video hit the SUBSCRIBE button and give a LIKE.